SX-Control – Vaccum
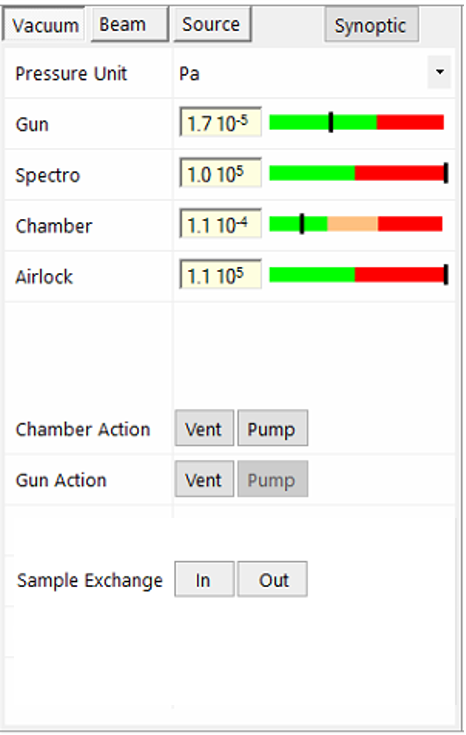
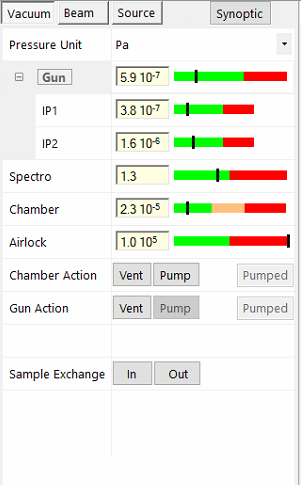
The vacuum sub-panel gives information on vacuum levels inside the different parts of the tool (Gun, Spectrometers, Analysis Chamber, Airlock).
Note that when using a FE source, an additional ionic pump is present.
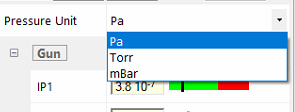
The unit can be changed (Pa, Torr or mBar) by clicking on the Pressure Unit arrow.
The user can also vent/pump the chamber and the gun and he can move in/out the sample holder inside the analysis chamber.
When moving in a sample holder, the user has to open the airlock, place the sample holder and close the airlock. When clicking on the “In” button, a pop-up window appears asking “Do you want to pump the airlock”. By clicking on the yes, the airlock is pumped. When the airlock is pumped, a pop-up window asks the user the open the transfer valve and transfer the holder inside the analysis chamber. When it’s done, close the valve and click on OK button. The chamber is then pumped and EPS opens. Analysis can start.
When moving the sample holder out of the analysis chamber, the user has to click on Out button. The stage automatically moves to the reference position and a pop-up window asks the user if he wants to pump the airlock (that is vented to prevent any leaks). When clicking on yes, the airlock is pumped and a pop-up window asks the user to open the transfer valve, move out the holder from the chamber to the airlock and close the transfer valve. When it’s done, the airlock is vented, and the user can take off the sample holder from the airlock.
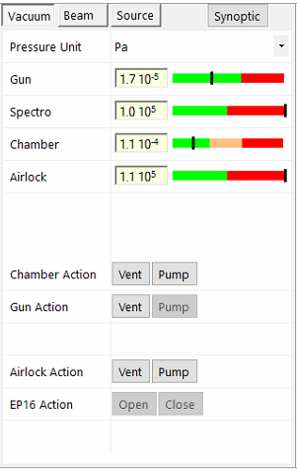
A special action (open/close) is possible on the EP16 valve (between the airlock and the chamber) and on venting/pumping the airlock only on Skaphia (shielded EPMA).
The upper left panel of the SX-Control module grants access to the vacuum and beam conditions of the instrument. In the ‘Vacuum’ subpanel, vacuum levels and status indicators are shown for the electron gun chamber (high vacuum gauge and ion pump readings), the WDS spectrometer volume, the sample chamber, as well as the sample exchange, chamber or airlock.
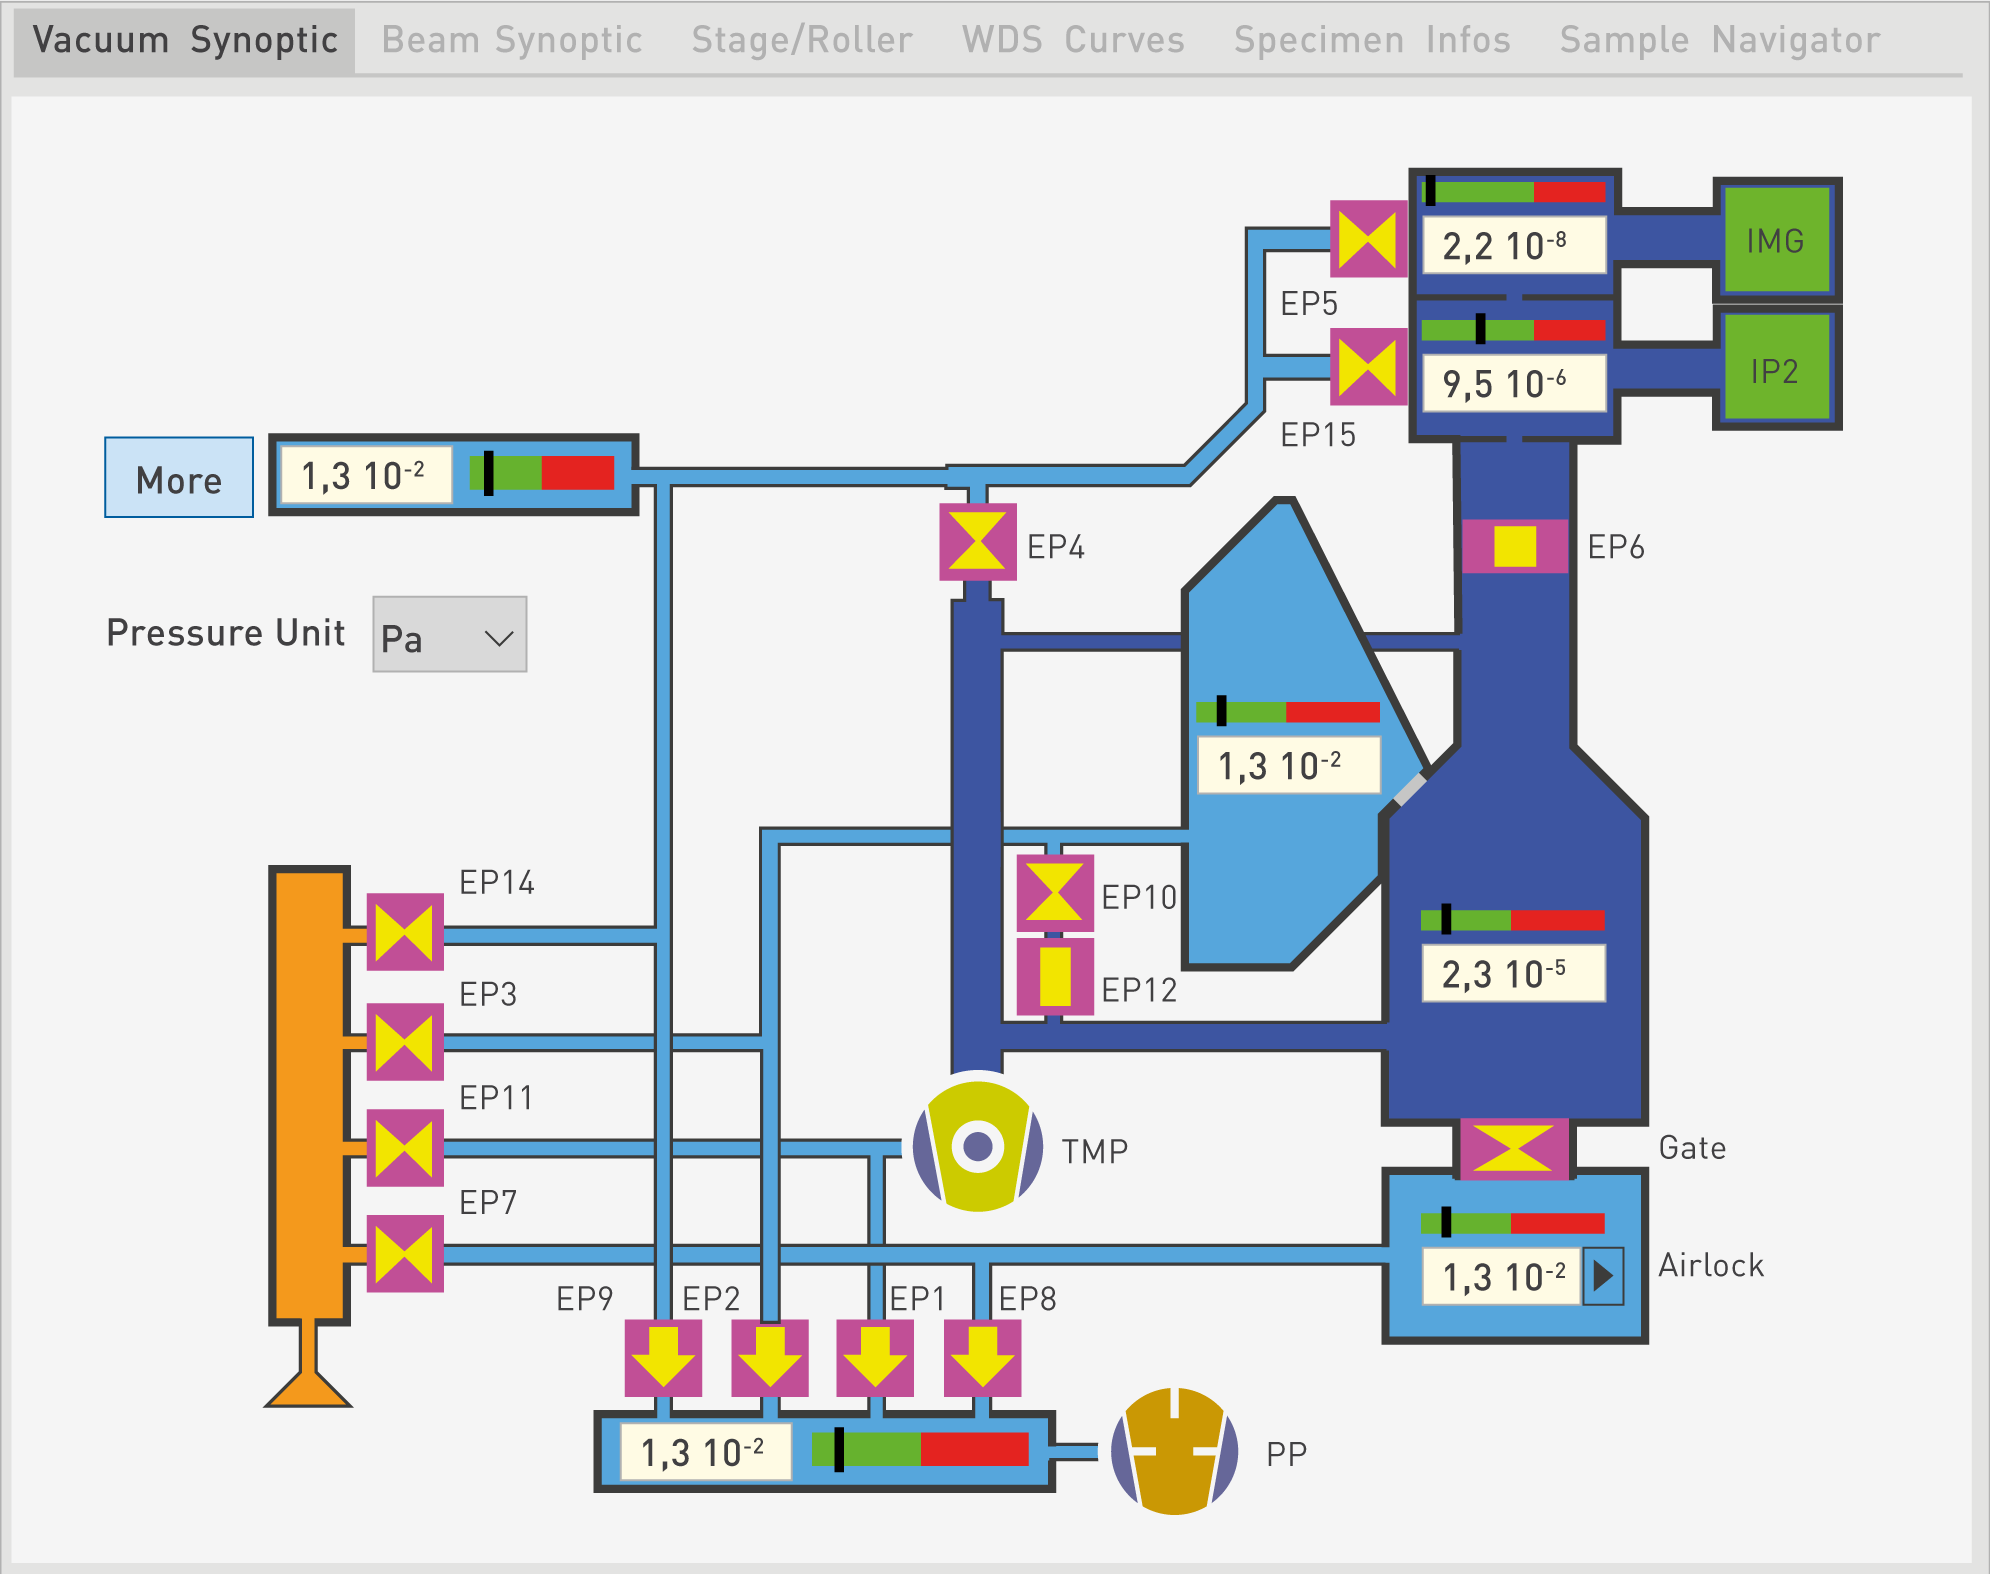
The ‘Pressure unit’ scrolling list allows to choose between Pa, Torr and mBar for the pressure displayed values.
The value of each pressure gauge is updated almost in real-time. The status indicators indicate whether the vacuum levels are acceptable for instrument operation (green), degraded (orange) or unacceptable (red).
One click on the ‘Vacuum Synoptic’ button activates the ‘Vacuum Synoptic’ tab on the ‘Multipurpose panel’ with an extended view of the current vacuum status levels throughout the instrument. The open/closed status of the vacuum valves is readily visible, as well as the on/off status of the ion Pump(s), secondary pump (Turbo-Molecular (TMP) or Diffusion) and Primary Pump (PP) systems.
Note: At the primary vacuum level, users have the option to temporarily suspend the pumping of the rotary pumps in order to suppress mechanical vibrations by clicking on the ‘Suspend’ button. This function is generally useful for SEM imaging purposes at high magnification. The Primary Pumping normal state can be regained by clicking on the ‘Resume’ button. Primary pumping will automatically restart if the primary vacuum degrades beyond the required pressure to back the secondary pump.
The SX100, SX Five and SX Five FE vacuum systems differ from one to another and each instrument type will therefore display different vacuum information. For example, the SX100 has two primary pumps, may have a diffusion or turbo-molecular pump, has one ion pump and has electro- and manual vacuum valves. The SX Five has one primary pump, a turbo-molecular pump, an ion pump and electro-pneumatic (EP) valves. The SX Five FE adds a second ion pump to the SX Five configuration.
Venting and pumping of the instrument chambers are controlled from this Vacuum menu in order to transfer samples in and out of the instrument, from the airlock to the analysis chamber.
By clicking on the More button, the program displays the names of the various gauges and valves, while the Less function will display only the pressure values.
Related Article
SX-Control – Overview
Reading Duration 2min
The Control module may be opened from the SX-Control button in the SX-AppBar
SX-Control – Beam
Reading Duration 18min
The second panel of the SX-Control module is dedicated to the beam conditions.
SX-Control – Source
Reading Duration 1min
This tab is only dedicated to the SX system including the Field Emission Gun (FEG).
Contact

Our support team is ready to help you
FAQ

Answers to some common questions from SX users
Troubleshooting

Quickly search for solutions to instrument issues